Static Tables from CSV
Upload a CSV file and turn it into a fully queryable SQL table in Cluvio — no database setup needed. This is a quick way to analyze spreadsheet exports, third-party data, or reference datasets.
Requirements
- Encoding: CSV files must use UTF-8.
- File size: Maximum 250 MB per file. Larger files must be split.
- Structure: After any skipped lines and an optional header row, every remaining line must be CSV data.
- Separator: Comma, semicolon, or tab.
- Consistent columns: All rows must have the same number of columns for the chosen separator.
Creating a Static Table
Step 1: Upload File
To create a static table from a CSV file:
- Select Add Static Table on the datasources overview page.
- Click Select File and choose your CSV file.
- The file uploads securely to Cluvio's servers.
- Cluvio analyzes the file and detects CSV parsing configuration.

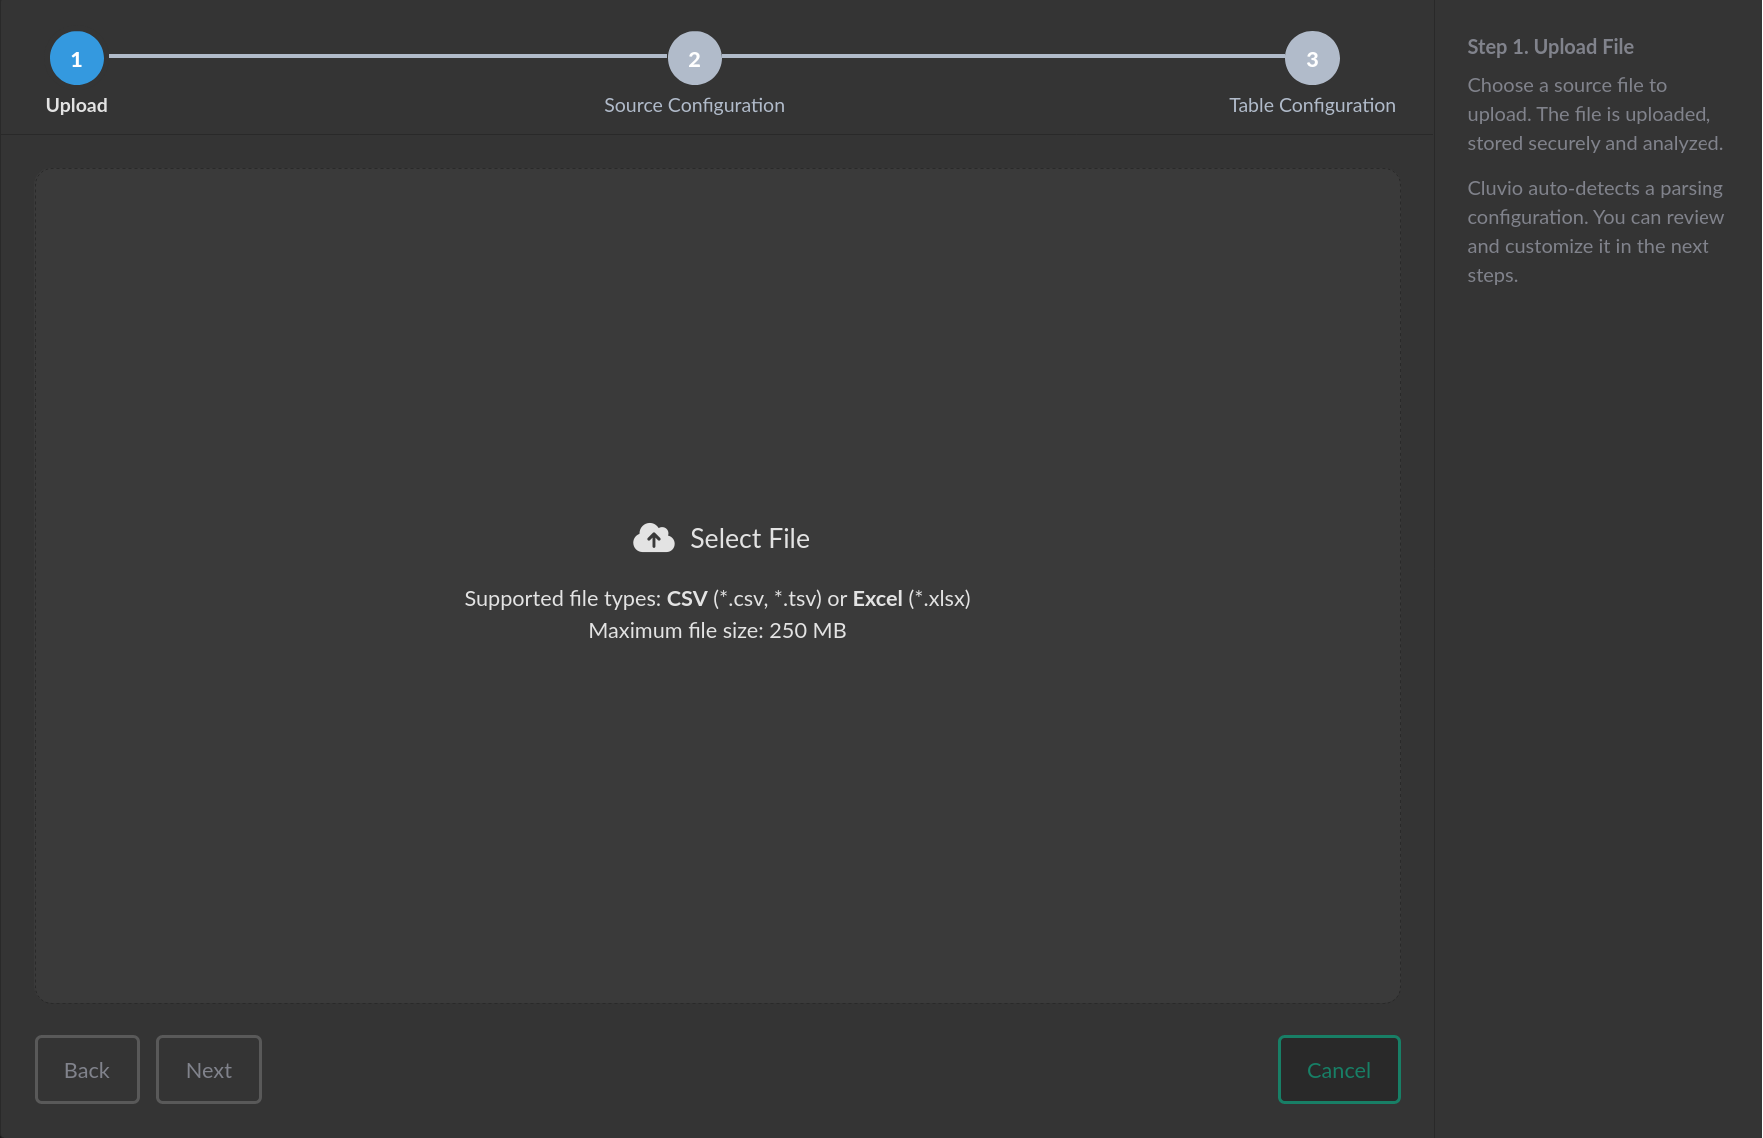


After successful upload and analysis, proceed to configure how Cluvio extracts the tabular data from your file.
Step 2: Source Configuration
Cluvio auto-detects the CSV parse settings. Review and adjust if needed:
- Column separator — comma, semicolon, tab, etc.
- Decimal separator — dot or comma
- Header row — yes/no
- Skip lines — number of initial lines to skip
Time Zone: Static tables store all date/time values in UTC. If your file
uses a different time zone, select it from the drop-down so Cluvio can convert
accordingly. For example, 2025-01-15 14:30 with America/New_York selected is
interpreted as 2:30 PM Eastern Time and stored as UTC. Query results are
displayed in UTC unless a dashboard time zone
is in effect.


Step 3: Table Configuration
In this step, configure and preview the table that will be created from the CSV file.


Choose a Table Name — this is what you'll reference in SQL queries. It must be unique across all static tables.
Use the Column List to see all detected columns and exclude any you don't need.
Select the Column Detail tab or click on any column in the list to inspect it in detail:
- Value distribution histograms and frequency analysis.
- Value counts and min/max values.
- The column's total data size.


You can customize column names and types. The On Invalid Value setting controls what happens when a value cannot be converted to the column's type:
- Error (default) — saving is disabled until the issue is resolved, e.g. by changing the column type or fixing the source data.
- Skip Value — the invalid value is replaced with NULL.
- Skip Row — the entire row containing the invalid value is excluded.
When the currently applied configuration is valid, the Preview Table tab shows the first 100 rows of parsed data as they will appear in Cluvio when querying the table. Verify that the data looks correct.


Querying a Static Table
After creating a static table, query it using the Static Tables datasource in the report editor. See Using Static Tables.


Reconfiguring a Static Table
Cluvio retains the original file, so you can change a static table's configuration at any time — Cluvio applies the updated settings and rebuilds the table.
There are two ways to reconfigure:
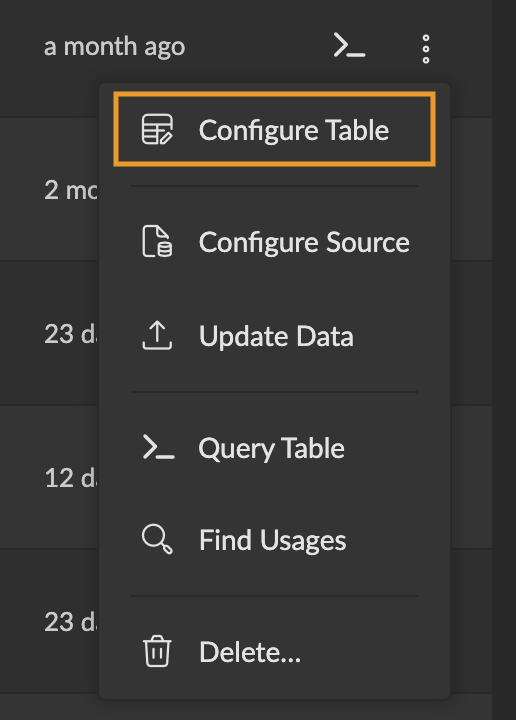
Change Table Configuration
Click on the table name in the static tables list, or select Configure Table from the drop-down menu. This opens a modal for the selected table where you can adjust column names, types, and formats, review value distributions, and preview the data — just as in the original upload.


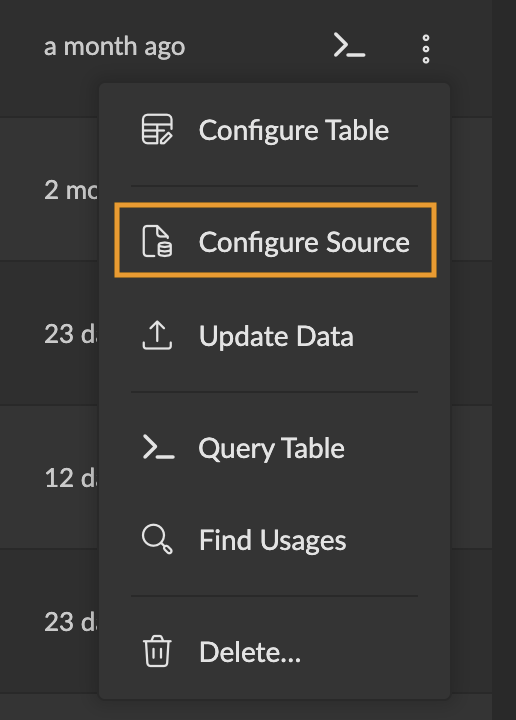
Change Source Configuration
Click on the source file type (e.g. csv) in the static tables list, or
select Configure Source from the drop-down menu. This opens a full
configuration modal where you can change how Cluvio parses the CSV file
(separator, header row, time zone, etc.) as well as configure the table — just
as in the original upload. You can also download
the original file.


Updating Data
To update your static table with new data, use the Update Data option from the drop-down menu to upload a new CSV file.

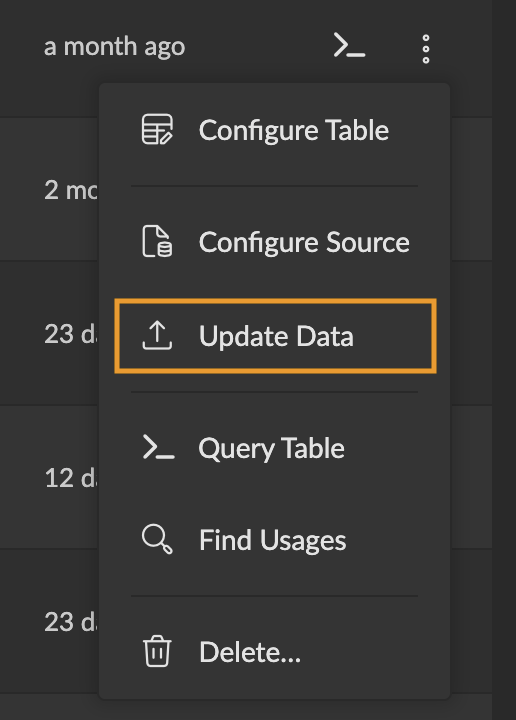
Select the new file, just as in the original upload. If the schema matches, click Save to update the table with the new data. To adjust settings even when the schema hasn't changed, check Reconfigure source & tables.


If Cluvio detects schema changes (e.g. new or removed columns), you are guided to review the source and table configuration.


By default, new columns are included (i.e. are added to the table). Proceed through the next steps to review the changes.


Upon saving, you are prompted to confirm a summary of the schema changes.


When saving schema changes that drop columns, rename columns or change column types, existing SQL queries on reports, filters or alerts using this table may start to fail.
Value Types and Formats
Cluvio supports the following value types for CSV data:
| Type | Description | Example Values | Formats & Limits |
|---|---|---|---|
| Boolean | True or false values | true, false | Case-insensitive |
| Integer | Whole numbers | 42, -1000, 0 | Signed 64-bit (-9,223,372,036,854,775,808 to 9,223,372,036,854,775,807) |
| Float | Decimal numbers | 3.14, -0.5, 1.23e10 | 64-bit floating-point (double precision) |
| String | Text values | Hello, Product A | UTF-8 encoded, max 1 MiB (1,048,576 bytes) per value |
| Date | Calendar dates | 2025-12-1412/24/202524.12.2025 | Pre-defined: ISO 8601, US, EU Custom: See Date-Time Formats |
| Time | Time of day | 15:10:3012:00 AM | Pre-defined: ISO 8601, AM/PM Custom: See Date-Time Formats |
| DateTime | Date and time combined | 2025-12-14T14:15:302025-12-14 14:15:30 | Pre-defined: ISO 8601, RFC 3339, UNIX timestamp Custom: See Date-Time Formats |
Custom Date and Time Formats
For Date, Time, and DateTime columns, you can define custom formats using format specifiers:
Date specifiers: YYYY, MMMM, MMM, MM, M, DD, D
Time specifiers: HH, H, hh, h, mm, ss, A, a
Allowed separators: whitespace, ,, -, :, ., /, T, |
See the Date-Time Formats guide for complete details on custom formats.